
Mastering Lawn Mower Maintenance, Your Complete Guide
- wuj529
- Mar 2, 2024
- 13 min read
Updated: Mar 23, 2024
Maintaining a well-functioning mower is just as crucial as nurturing a healthy lawn. Much like skipping treatments or scrimping on water can compromise your lawn's vitality, neglecting mower care undermines the quality of your turf.
Regular maintenance not only prevents expensive repairs but also optimizes performance and extends the lifespan of your mower. With a willingness to get your hands dirty, you can efficiently tackle mower upkeep tasks in a matter of minutes.

Tuning Up Your Lawn Mower
Each lawn mower warrants an annual tune-up to ensure peak performance. Fortunately, this is a straightforward process that consumes no more than 30 minutes. For added convenience, there are Home Maintenance Kits tailored to various models of mowers.

Oil and Oil filter change: How to
Preparation: Start by allowing the engine to cool down to prevent burns. Park your mower on a level surface and remove the spark plug wire to prevent accidental starts.
Draining the Old Oil: Place the drain pan beneath the oil drain plug, typically located on the underside of the engine. Loosen the drain plug with a wrench and allow the old oil to drain completely into the pan.
Removing and Replacing the Oil Filter: Once the old oil has drained, locate the oil filter, which is typically a cylindrical component attached to the side of the engine. Use the Strap-Top Oil Filter Wrench to loosen and remove the old oil filter. Before installing the new oil filter, apply a small amount of fresh oil to the rubber gasket to ensure a proper seal. Then, hand-tighten the new oil filter in place.
Adding New Oil: Refer to your mower's manual to determine the correct type and amount of oil to use. Using a funnel, pour the new oil into the oil fill tube until it reaches the recommended level. Avoid overfilling the engine, as this can lead to damage.
Checking Oil Level: Once you've added the new oil, replace the oil fill cap and wipe away any spills or drips. Reconnect the spark plug wire and start the engine briefly to circulate the new oil. Then, turn off the engine and check the oil level using the dipstick. Add more oil if necessary to reach the proper level.
Types of Engine Oils for 4-Stroke Engines:
When it comes to selecting the right oil for your lawn mower, it's essential to choose one that's compatible with 4-stroke engines. Here are some common types of engine oils suitable for lawn mowers:
SAE 30: This is a conventional oil suitable for use in warmer temperatures. It provides excellent protection against engine wear and is ideal for mowers operating in moderate to hot climates.
SAE 10W-30: This multi-viscosity oil offers improved cold-start performance compared to SAE 30 oil. It's suitable for use in a wide range of temperatures, making it a versatile choice for year-round use.
SAE 5W-30: Similar to SAE 10W-30, this oil offers enhanced cold-start performance and is suitable for use in colder climates. It provides excellent lubrication and protection for your mower's engine.
Synthetic Oils: Synthetic oils offer superior performance and protection compared to conventional oils. They provide better lubrication, enhanced engine cleanliness, and improved fuel efficiency. While they may be more expensive, synthetic oils offer excellent long-term benefits for your mower.
By following these steps, you can easily replace the air filter in your lawn mower and ensure that it continues to run smoothly. Remember to perform this maintenance task regularly to keep your mower in top and enjoy a beautiful manicured lawn year-round.

Air Filter Replacement
One of the key aspects of keeping your lawn mower running smoothly is regular maintenance. Among the various maintenance tasks, replacing the air filter is crucial for ensuring optimal performance and longevity of your mower. In this comprehensive guide, we'll walk you through the process of replacing your lawn mower's air filter step by step.
Importance of Air Filter Maintenance
The air filter plays a vital role in keeping dirt, dust, and debris out of your mower's engine. A clean air filter allows for proper airflow, which is essential for combustion and overall engine performance. Over time, the air filter can become clogged with debris, reducing airflow and causing the engine to run poorly. Regularly replacing the air filter helps prevent these issues and ensures your mower continues to operate efficiently.
Types of Air Filters
There are two main types of air filters commonly found in lawn mowers: paper air filters and foam air filters. Paper air filters are disposable and typically come pre-oiled to trap small particles effectively. Foam air filters, on the other hand, are washable and reusable, making them a more eco-friendly option.
Tools and Supplies Needed
Before starting the air filter replacement process, gather the necessary tools and supplies:
Replacement air filter (compatible with your mower model)
Screwdriver or wrench (to remove the air filter cover)
Compressed air or gentle brush (for cleaning any debris around the air filter housing)
Clean cloth or paper towels (for wiping any dirt or oil from the filter housing)
Step-by-Step Guide to Air Filter Replacement
Follow these steps to replace the air filter in your lawn mower:
Preparation: Allow the engine to cool down completely before starting the replacement process. This helps prevent any accidental burns and ensures safe handling of the mower.
Locating the Air Filter: Depending on your mower model, the air filter housing may be located on the side or top of the engine. Refer to your mower's manual to locate the air filter cover.
Removing the Air Filter Cover: Use a screwdriver or wrench to loosen and remove the screws or bolts securing the air filter cover. Carefully lift off the cover to access the air filter.
Removing the Old Air Filter: Take out the old air filter from the housing. Inspect the filter for any signs of damage or excessive dirt accumulation. If the filter is dirty or damaged, discard it and proceed with installing the new one.
Installing the New Air Filter: Place the new air filter into the housing, ensuring it fits snugly and securely. Make sure the filter is positioned correctly to allow for proper airflow into the engine.
Replacing the Air Filter Cover: Carefully place the air filter cover back onto the housing and secure it with the screws or bolts. Tighten the fasteners securely to prevent any air leaks.
Final Check: Once the air filter is installed, visually inspect the area around the filter housing for any signs of dirt or debris. Use compressed air or a gentle brush to clean any remaining debris.
By following these steps, you can easily replace the air filter in your lawn mower and ensure that it continues to run smoothly. Remember to perform this maintenance task regularly to keep your mower in top condition and enjoy a beautifully manicured lawn year-round.
Fuel Filter Replacement: Ensuring Peak Performance of Your Lawn Mower
As part of your lawn mower maintenance routine, replacing the fuel filter is essential for maintaining optimal engine performance and preventing potential issues caused by contaminated fuel. In this detailed guide, we'll take you through the step-by-step process of replacing the fuel filter in your lawn mower.
Understanding the Role of Fuel Filters
Fuel filters play a critical role in ensuring that only clean fuel reaches the engine. They trap dirt, debris, and other contaminants present in the fuel, preventing them from entering the engine's delicate components. Over time, fuel filters can become clogged, leading to reduced fuel flow and engine performance. Regular replacement of the fuel filter is necessary to maintain proper engine function and prevent damage.
Types of Fuel Filters
There are two main types of fuel filters commonly used in lawn mowers: inline fuel filters and in-tank fuel filters. Inline fuel filters are located along the fuel line between the fuel tank and the engine, while in-tank fuel filters are situated inside the fuel tank itself. The type of fuel filter your mower requires will depend on its specific design and fuel system setup.
Tools and Supplies Needed
Before starting the fuel filter replacement process, gather the following tools and supplies:
Replacement fuel filter (compatible with your mower model)
Pliers or fuel line removal tool (for disconnecting fuel lines)
Clean rags or paper towels (for cleaning up any spilled fuel)
Safety goggles and gloves (to protect your eyes and skin from fuel splashes)
Step-by-Step Guide to Fuel Filter Replacement
Follow these steps to replace the fuel filter in your lawn mower:
Preparation: Ensure that the mower's engine is cool and that the mower is placed on a flat, stable surface. Disconnect the spark plug wire to prevent accidental starts.
Locating the Fuel Filter: Depending on your mower model, the fuel filter may be located along the fuel line or inside the fuel tank. Consult your mower's manual to locate the fuel filter and access it accordingly.
Disconnecting the Fuel Lines: Use pliers or a fuel line removal tool to disconnect the fuel lines from the fuel filter. Be prepared for some fuel spillage, so have clean rags or paper towels handy to wipe up any spills.
Removing the Old Fuel Filter: Once the fuel lines are disconnected, carefully remove the old fuel filter from its mounting bracket or housing. Take note of the direction of fuel flow indicated on the filter.
Installing the New Fuel Filter: Install the new fuel filter in the same orientation as the old one, ensuring that the fuel flow direction is correct. Secure the filter in place using any retaining clips or brackets provided.
Reconnecting the Fuel Lines: Carefully reconnect the fuel lines to the new fuel filter, ensuring a tight and secure fit. Double-check for any leaks or loose connections.
Final Checks: Before starting the engine, inspect the area around the fuel filter for any signs of fuel leaks. If everything looks secure, reconnect the spark plug wire and start the engine to verify proper operation.
By following these steps, you can easily replace the fuel filter in your lawn mower and ensure that it continues to run smoothly. Regular replacement of the fuel filter as part of your maintenance routine will help keep your mower's engine in top condition and ensure reliable performance season after season.
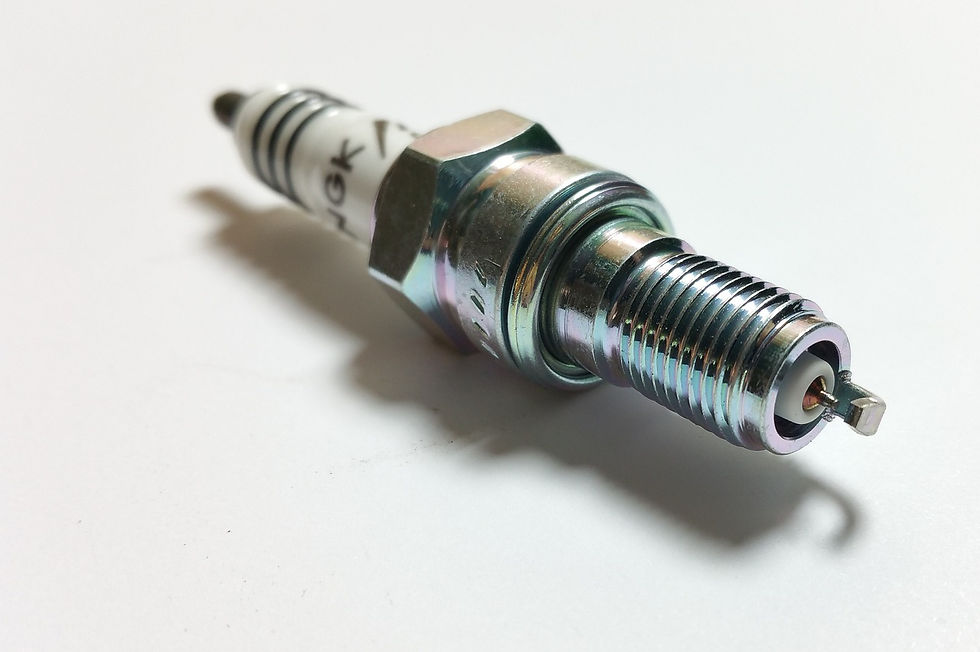
Spark Plug Replacement: Igniting Efficiency in Your Lawn Mower
One of the fundamental aspects of maintaining your lawn mower's engine efficiency is regular spark plug replacement. Spark plugs play a vital role in igniting the fuel-air mixture within the engine's combustion chamber, ensuring smooth operation and optimal performance. In this comprehensive guide, we'll walk you through the step-by-step process of replacing the spark plugs in your lawn mower.
Significance of Spark Plug Maintenance
Spark plugs are essential components of the engine's ignition system, generating the spark necessary to ignite the air-fuel mixture in the combustion chamber. Over time, spark plugs can become fouled or worn out, leading to misfires, poor fuel efficiency, and reduced engine performance. Regularly replacing the spark plugs helps maintain proper combustion, ensuring your mower operates efficiently and reliably.
Types of Spark Plugs
There are several types of spark plugs available, each designed for specific engine requirements and operating conditions. Common types include:
Copper Core Spark Plugs: Standard spark plugs with a copper core for excellent conductivity.
Platinum Spark Plugs: Long-lasting plugs with a platinum tip for improved durability and performance.
Iridium Spark Plugs: Premium plugs featuring an iridium electrode for superior ignition and longevity.
Before purchasing replacement spark plugs, consult your mower's manual or a trusted retailer to ensure you select the correct type and size for your engine.
Tools and Supplies Needed
Before you begin replacing the spark plugs, gather the following tools and supplies:
Socket wrench with spark plug socket
Spark plug gap gauge
Replacement spark plugs (compatible with your mower's engine)
Clean cloth or paper towels (for cleaning spark plug recesses)
Dielectric grease (optional, for lubricating spark plug threads)
Step-by-Step Guide to Spark Plug Replacement
Follow these steps to replace the spark plugs in your lawn mower:
Preparation: Allow the engine to cool completely before starting the replacement process. Disconnect the spark plug wire to prevent accidental starts.
Locating the Spark Plugs: Depending on your mower's engine configuration, the spark plugs may be located on the cylinder head(s) or beneath a protective cover. Refer to your mower's manual to locate the spark plugs.
Removing the Old Spark Plugs: Use a socket wrench with a spark plug socket to carefully loosen and remove the old spark plugs from their respective recesses. Take note of the condition of each plug and inspect for signs of fouling or wear.
Checking and Adjusting the Spark Plug Gap: Use a spark plug gap gauge to check the gap between the electrodes of the new spark plugs. Refer to your mower's manual for the recommended gap specification. If necessary, carefully adjust the gap using the gap gauge.
Installing the New Spark Plugs: Carefully thread the new spark plugs into their respective recesses by hand, ensuring they are seated properly. Use the socket wrench to tighten the spark plugs snugly, taking care not to over-tighten.
Applying Dielectric Grease (Optional): If desired, apply a small amount of dielectric grease to the threads of each spark plug before installation. This helps prevent corrosion and makes future removal easier.
Reconnecting the Spark Plug Wire: Once all spark plugs are installed, reconnect the spark plug wire to each spark plug. Ensure a secure connection to prevent misfires during operation.
Testing the Engine: Start the engine and allow it to idle for a few moments to ensure proper spark plug operation. Listen for smooth and consistent engine operation, indicating successful replacement.
By following these steps, you can easily replace the spark plugs in your lawn mower and ensure reliable engine performance. Regular spark plug maintenance is essential for maintaining optimal combustion efficiency and prolonging the life of your mower's engine. Incorporate spark plug replacement into your routine maintenance schedule to keep your lawn mower running smoothly season after season.

Sharpening Mower Blades: Enhancing Cutting Efficiency for a Perfectly Manicured Lawn
Sharp mower blades are essential for achieving a clean and precise cut, promoting the health and appearance of your lawn. In this comprehensive guide, we'll take you through the step-by-step process of sharpening the blades on your lawn mower, ensuring optimal cutting efficiency and a beautifully manicured lawn.
Importance of Blade Sharpening
Mower blades can become dull over time due to regular use, resulting in tearing rather than cutting grass blades. Dull blades not only compromise the aesthetics of your lawn but also stress the grass, making it more susceptible to diseases and environmental stressors. Sharpening your mower blades regularly helps maintain a crisp and clean cut, promoting healthier grass growth and a lush lawn.
Tools and Supplies Needed
Before you begin sharpening the mower blades, gather the following tools and supplies:
Socket wrench or blade removal tool
Bench grinder or handheld grinder
Blade balancer or nail and sturdy surface
Safety gloves and goggles
Cleaning brush or wire brush
Optional: Replacement blades (if current blades are damaged beyond repair)
Step-by-Step Guide to Blade Sharpening
Follow these steps to sharpen the blades on your lawn mower:
Preparation: Ensure the mower is turned off and the spark plug wire is disconnected to prevent accidental starts. Safely elevate the mower or tilt it on its side to access the blades.
Removing the Blades: Use a socket wrench or blade removal tool to loosen and remove the bolts or fasteners securing the mower blades. Carefully remove the blades from the mower deck.
Cleaning the Blades: Use a cleaning brush or wire brush to remove any dirt, debris, or grass clippings from the blades. Ensure the blades are clean and free of any obstructions before sharpening.
Sharpening the Blades: Using a bench grinder or handheld grinder, carefully sharpen the cutting edges of the blades. Maintain a consistent angle and apply light pressure to achieve sharp, clean edges. Take care to remove an equal amount of material from each blade to maintain balance.
Balancing the Blades: After sharpening, check the balance of each blade using a blade balancer or a nail and a sturdy surface. Place the center hole of each blade on the balancer or nail and observe whether it tilts to one side. If a blade is unbalanced, carefully remove material from the heavier side until it rests evenly.
Reinstalling the Blades: Once sharpened and balanced, reinstall the blades onto the mower deck in the correct orientation. Tighten the bolts or fasteners securely to ensure the blades are properly seated.
Testing the Blades: Start the mower and engage the blades to ensure they are rotating smoothly and without vibration. Listen for any unusual noises or vibrations, which may indicate an issue with blade installation or balance.
By following these steps, you can effectively sharpen the blades on your lawn mower and ensure optimal cutting performance. Incorporate blade sharpening into your regular lawn mower maintenance routine to keep your mower operating efficiently and maintain a healthy, manicured lawn throughout the mowing season.
Cleaning Your Lawn Mower: Preserving Performance and Prolonging Lifespan
Regular cleaning of your lawn mower is essential for maintaining its performance, preventing corrosion, and prolonging its lifespan. In this detailed guide, we'll walk you through the step-by-step process of cleaning your lawn mower thoroughly, ensuring it remains in top condition for optimal operation.
Importance of Cleaning
Cleaning your lawn mower removes dirt, grass clippings, and debris that accumulate during mowing sessions. These contaminants can clog air intakes, cooling fins, and other vital components, leading to reduced airflow, overheating, and potential engine damage. By cleaning your mower regularly, you can prevent these issues, ensure proper airflow, and extend the life of your equipment.
Basic Lawn Mower Maintenance Schedule: Keeping Your Mower in Prime Condition
Maintaining a regular maintenance schedule is crucial for keeping your lawn mower in optimal condition and ensuring reliable performance season after season. In this guide, we'll outline a basic maintenance schedule to help you stay on top of essential tasks and preserve the longevity of your mower.
After Each Use
Cleaning: After each use, remove grass clippings, dirt, and debris from the mower deck, wheels, and underside of the machine using a brush or hose. Keeping the mower clean prevents buildup and reduces the risk of corrosion.
Inspecting Blades: Check the condition of the mower blades for any signs of damage, dullness, or wear. Sharpen or replace blades as needed to maintain a clean and precise cut.
Every Month or 25 Hours of Use
Oil Check: Check the oil level in the engine crankcase and top up if necessary. Refer to your mower's manual for the recommended oil type and viscosity. Change the oil according to the manufacturer's guidelines, typically every 25 hours of use or once a month.
Air Filter Inspection: Inspect the air filter for dirt, debris, and damage. Clean or replace the air filter if it appears clogged or worn to ensure proper airflow to the engine.
Every Three Months or 50 Hours of Use
Fuel System Maintenance: Check the fuel lines, fuel filter, and carburetor for any signs of damage or blockages. Replace the fuel filter if necessary and clean the carburetor to ensure proper fuel delivery to the engine.
Spark Plug Inspection: Inspect the spark plug for signs of wear, fouling, or corrosion. Clean or replace the spark plug as needed to maintain proper ignition and engine performance.
Annually or 100 Hours of Use
Lubrication: Lubricate moving parts such as axles, spindles, and pivot points to prevent wear and ensure smooth operation. Use a lubricant recommended by the manufacturer for best results.
Belt and Pulley Check: Inspect the mower's belts and pulleys for wear, cracks, or damage. Replace any worn or damaged belts and tighten loose pulleys to maintain proper belt tension.
Additional Maintenance Tasks
Winterization: If storing the mower for an extended period, winterize it by draining the fuel tank or adding a fuel stabilizer, and storing it in a dry, sheltered location.
By following this basic maintenance schedule, you can ensure that your lawn mower remains in prime condition and continues to deliver reliable performance year after year. Regular maintenance not only extends the lifespan of your mower but also promotes a healthier and more beautiful lawn.


Comments